上一期我们整合了 Spring Boot,但是用的是假数据而且是明文。这一期我们将实现数据库整合和加密。
配置数据库 建立一个数据表,设立 3 个列:
id INT 自增主键
username VARCHAR(16) 非空
password VARCHAR(16) 非空
建表语句:
1
2
3
4
5
6
7
8
create table t_user ( id int auto_increment, username varchar(16) not null, password varchar(32) not null, constraint t_user_pk primary key (id) );
编写工具类 实现一个 MD5 加密的工具类:
1
2
3
4
5
6
7
8
9
10
package org.koorye.util;import org.apache.shiro.crypto.hash.Md5Hash;public class Md5Util public static String getMd5 (String source) Md5Hash md5Hash = new Md5Hash(source, "koorye_love_md5" , 1024 ); return md5Hash.toHex(); } }
整合 Spring Data JPA 编写实体类 1 2 3 4 5 6 7 8 9 10 11 12 13 14 15 16 17 18 19 20 21 22 23 24 25 26 27 28 29 30 31 32 package org.koorye.pojo;import lombok.Getter;import lombok.NoArgsConstructor;import lombok.Setter;import lombok.experimental.Accessors;import javax.persistence.*;@NoArgsConstructor @Getter @Setter @Accessors (chain = true )@Entity @Table (name = "t_user" )public class User @Id @GeneratedValue (strategy = GenerationType.IDENTITY) @Column (name = "id" ) private int id; @Column (name = "username" ) private String username; @Column (name = "password" ) private String password; @Override public String toString () return "ID: " + id + ", username: " + username + ", password: " + password; } }
编写 Dao 层 1 2 3 4 5 6 7 8 9 package org.koorye.dao;import org.koorye.pojo.User;import org.springframework.data.jpa.repository.JpaRepository;import org.springframework.data.jpa.repository.JpaSpecificationExecutor;public interface UserDao extends JpaRepository <User , Integer >, JpaSpecificationExecutor <User > }
编写 Service 层 编写一个接口:
1 2 3 4 5 6 7 package org.koorye.service;import org.koorye.pojo.User;public interface UserService void save (User user) }
实现接口:
1 2 3 4 5 6 7 8 9 10 11 12 13 14 15 16 17 18 package org.koorye.service;import org.koorye.dao.UserDao;import org.koorye.pojo.User;import org.springframework.beans.factory.annotation.Autowired;import org.springframework.stereotype.Service;@Service public class UserServiceImpl implements UserService @Autowired private UserDao userDao; @Override public void save (User user) userDao.save(user); } }
编写控制器 1 2 3 4 5 6 7 8 9 10 @Autowired private UserServiceImpl userService;@RequestMapping ("/api/register" )public String register (String username, String password) String md5 = Md5Util.getMd5(password); User user = new User().setUsername(username).setPassword(md5); userService.save(user); return "Register Success!" ; }
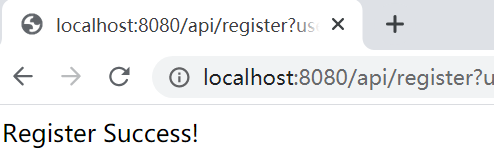
注册测试 访问页面:http://localhost:8080/api/register?username=koorye&password=123456
用户名:koorye,密码:123456.
注册成功:
查看数据库:
1 2 3 4 5 6 7 mysql> select * from t_user; +----+----------+----------------------------------+ | id | username | password | +----+----------+----------------------------------+ | 1 | koorye | 95030fceb85deaddba97489be5968abd | +----+----------+----------------------------------+ 1 row in set (0.00 sec)
可以看到,密码成功被加密存储!
实现登录 编写 Dao 层 findById 之外的方法需要我们自行提供接口方法:
1 2 3 4 5 6 7 8 9 package org.koorye.dao;import org.koorye.pojo.User;import org.springframework.data.jpa.repository.JpaRepository;import org.springframework.data.jpa.repository.JpaSpecificationExecutor;public interface UserDao extends JpaRepository <User , Integer >, JpaSpecificationExecutor <User > User findByUsername (String username) ; }
编写 Service 层 编写接口:
1 2 3 4 5 6 7 8 9 package org.koorye.service;import org.koorye.pojo.User;public interface UserService void save (User user) User getUserByUsername (String username) ; }
实现接口:
1 2 3 4 5 6 7 8 9 10 11 12 13 14 15 16 17 18 19 20 21 22 23 package org.koorye.service;import org.koorye.dao.UserDao;import org.koorye.pojo.User;import org.springframework.beans.factory.annotation.Autowired;import org.springframework.stereotype.Service;@Service public class UserServiceImpl implements UserService @Autowired private UserDao userDao; @Override public void save (User user) userDao.save(user); } @Override public User getUserByUsername (String username) return userDao.findByUsername(username); } }
编写控制器 控制器和上一期相同:
1 2 3 4 5 6 7 8 9 10 11 12 @RequestMapping ("/api/login" )public String login (String username, String password) Subject subject = SecurityUtils.getSubject(); UsernamePasswordToken token = new UsernamePasswordToken(username, password); subject.login(token); if (subject.isAuthenticated()) { return "Login Success!" ; } else { return "Login Failed!" ; } }
设置算法与散列 修改配置类中的 Realm:
1 2 3 4 5 6 7 8 9 10 11 @Bean (name = "userRealm" )public UserRealm userRealm () HashedCredentialsMatcher matcher = new HashedCredentialsMatcher(); matcher.setHashAlgorithmName("md5" ); matcher.setHashIterations(1024 ); UserRealm userRealm = new UserRealm(); userRealm.setCredentialsMatcher(matcher); return userRealm; }
加盐 修改 Realm 的登录验证。通过 Spring Data JPA 查到用户信息进行比对。
注意,要讲类添加 @Component 注解,交与 Spring 容器管理,才能自动注入。
同时,注入后会与配置类的 Bean 名字冲突,需要再修改配置类的 Bean:
1 2 3 4 5 6 7 8 9 10 11 12 13 14 15 16 17 18 19 20 21 22 23 24 25 26 27 28 29 30 31 32 33 34 35 36 37 38 39 40 package org.koorye.realms;import org.apache.shiro.authc.AuthenticationException;import org.apache.shiro.authc.AuthenticationInfo;import org.apache.shiro.authc.AuthenticationToken;import org.apache.shiro.authc.SimpleAuthenticationInfo;import org.apache.shiro.authz.AuthorizationInfo;import org.apache.shiro.realm.AuthorizingRealm;import org.apache.shiro.subject.PrincipalCollection;import org.apache.shiro.util.ByteSource;import org.koorye.pojo.User;import org.koorye.service.UserServiceImpl;import org.springframework.beans.factory.annotation.Autowired;import org.springframework.stereotype.Component;@Component public class UserRealm extends AuthorizingRealm @Autowired private UserServiceImpl userService; @Override protected AuthorizationInfo doGetAuthorizationInfo (PrincipalCollection principalCollection) return null ; } @Override protected AuthenticationInfo doGetAuthenticationInfo (AuthenticationToken authenticationToken) throws AuthenticationException User user = userService.getUserByUsername((String) authenticationToken.getPrincipal()); if (user == null ) { return null ; } else { return new SimpleAuthenticationInfo( authenticationToken.getPrincipal(), user.getPassword(), ByteSource.Util.bytes("koorye_love_md5" ), this .getName()); } } }
配置类:
1 2 3 4 5 6 7 8 9 10 11 12 13 14 15 16 17 18 @Bean (name = "realm" )public UserRealm userRealm () HashedCredentialsMatcher matcher = new HashedCredentialsMatcher(); matcher.setHashAlgorithmName("md5" ); matcher.setHashIterations(1024 ); UserRealm userRealm = new UserRealm(); userRealm.setCredentialsMatcher(matcher); return userRealm; } @Bean (name = "webSecurityManager" )public DefaultWebSecurityManager defaultWebSecurityManager (UserRealm realm) DefaultWebSecurityManager defaultWebSecurityManager = new DefaultWebSecurityManager(); defaultWebSecurityManager.setRealm(realm); return defaultWebSecurityManager; }
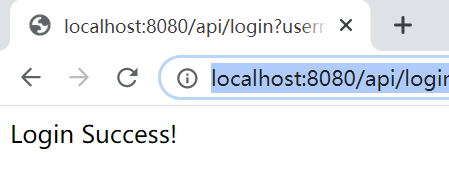
测试 访问页面:http://localhost:8080/api/login?username=koorye&password=123456
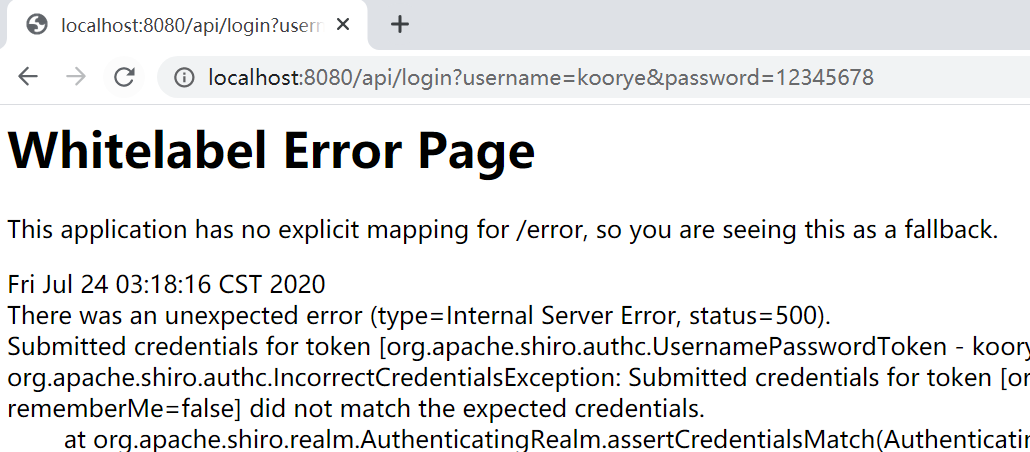
用户名或密码错误:
嗯?怎么报错了?我们修改一下 Controller:
1 2 3 4 5 6 7 8 9 10 11 12 13 14 15 16 17 18 @RequestMapping ("/api/login" )public String login (String username, String password) Subject subject = SecurityUtils.getSubject(); UsernamePasswordToken token = new UsernamePasswordToken(username, password); try { subject.login(token); } catch (UnknownAccountException e) { return "Unknown username." ; } catch (AuthenticationException e) { return "Unknown password." ; } if (subject.isAuthenticated()) { return "Login Success!" ; } else { return "Login Failed!" ; } }
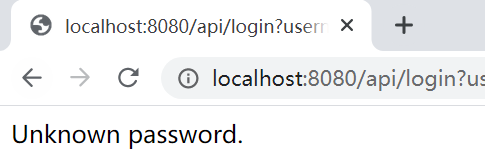
用户名正确,密码错误:
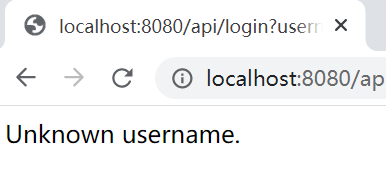
用户名不存在:
测试全部成功!